Thursday, 23 July 2020

Rear Brake Lever Pedal

   In motorcycling we are lucky that most higher specifcation bikes have adjustable hand and foot controls. The reach for the rear brake pedal was a bit far for my liking. Since I refurbished the brakes I have really had to stretch to apply the rear brake (for purists and the pedantic I know they are linked). Whilst I was working on the clutch fluid replacement (click HERE for that story)


   I decide the investigate adjustment of the rear foot operated brake. I found there was an adjuster. It is on the offside by the brake pedal. It was handy that the belly pan was off for the clutch fluid job. I squirt of 3in1 oil and a rub with the toothbrush released the grip of the rust. A 10mm spanner held the adjuster and 12mm spanner undid the locking nut. Once the locking nut was freed it was a straightforward job to twiddle the 10mm adjuster until the pedal was at the desired level. The locking nut was then....er locked.


   The next job which, is often over looked, is to adjust the brake light switch. This switch is in the sme area as the brake pedal adjuster but is made of plasitic. So some care is needed. a splash of 3in1oil freed the threads. It was just a case of holding the switch body with a pair of pliers and spinning the locking nut until the stop light came on when the brake pedal was depressed. Its the little things.


With that jobs completed the belly pan was refitted.    

Service Rear Suspension

   This job was really about servicing the remore preload unit. On my rides I have been fiddling about the proload to get a comfy ride and improve cornering. This bike tends to wash out in corners and on roundabouts. There is no adjustment on the front suspension. There are few suspension settings to adjust on the rear suspension unit, just preload and rebound damping. My wife and I are probably in the middle weight range, even a bit lighter than the expected Pan riders, so the spring rate should not be an issue.  There is nothing I can do about the spring raterebound or the damping except adjust the screw. The preload adjuster is a different matter. A little bit of internet research showed the preload unit was prone to loosing fluid and so the ability to adjust the preload on the shock. Click HERE to check out this Youtube video for the details on how to asses if the preload adjuster needs attension and how to go about the job. You need the seats removed but not the fairing just the nearside side panel. You don't many tools. A 10mm socket, a Phillips screw drive and a pointy probe. It is not clear in the videos but you top up the unit with fork oil. I happened to have 10 weight oil left over from the front suspension overhaul.


   I removed the side panel and the two 10mm bolts hold the adjuster unit to the support bracket. My unit was at least as bad, and probably worse than the unit in the video. I was most concerned I might loose the the spring loaded ball bearing. In the end I managed the ball quite easily as the spring and ball where gummed with dirt in the old grease.
  

   As per the video I removed the unit and tipped out the oil. Oil, well, there was a bit. The black bits are from under the screw knob.I did as instructed and flushed out the unit. As the video guy suggested I marked the banjo bolt and preload unit before starting and it was helpful in being able to reposition and refit the unit on to the preload support bracket. Whilst I had the unit in bits I cleaned and refurbished all the parts that were accesible. I had been a bit over enthusiastic with the rattle can so I spent a few minutes with 1500 grade paper sanding off over spray from the prelaod unit. the unit wa srefilled with 10 weight suspention oil.


   Once the preload was refitted one could feel the resistance of the oil with one and half turns of the adjuster knob. I also checked the rebound adjuster screw for free movement. I am pleased to report it works perfectly. The side panel was refitted.

The next job will to go for a spin and adjust the preload the damping to suit me.


Next job....buy new tyres. I am thinking of MICHELIN Pilot Road 4 GT.

Replace Clutch Fluid

   The Pan has a hydraulic actuated clutch. "So what" I hear you say. The MOT bloke said the clutch had a funny bite as he had to move it around the garage. I too though the operation of the clutch was a little strange. Not enough to be worrisome just "not so". The Pan was registered in 2004. I suspect the clutch fluid has never been changed. Brake and clutch fluid (they are the same thing) absorb water over time and the fluid regrades. The hydrualic system can loose fluid or gain air from microscopic leaks. The fact the the clutch master cylinder resevoir cap screws were was seized backs up that theory. Click HERE to read the blog on replacing the screws in the clutch master cylinder.

   Changing the clutch fluid should not be that difficult; I had replaced the reservoir screws so they came out without and hitch. So long as can find where the bleed nipple for the slave cylinder is situated. I tend not to look in the owner's manual anymore but go straight to YouTube. There is some proper crap there but there is usually a nugget of gold in the videos. This link, click HERE, takes you to the chap who gave me a clue as to where the clutch slave cylinder bleed nipple was sited and whether is was an easy job. I had a feeling the bleed nipple would be hidden behind the faring somewhere. It seemed sensible to tackle the job whilst I had the belly pan off as part of the wiring upgrade for the Sat Nav and the USBs.

   The clutch bleed nipple is located on the near side just behind the bottom of the coolant expansion tank. It is easy to get to once the belly pan is removed. In the picture you can see I have a 10mm ring spanner on the bleed nipple and the tube leading down the catch bottle. Bleeding the clutch is just the same as bleeding brakes. With the nipple closed, pump the lever the build up pressure in the line. Undo the nipple, the pressure in the line is released and the air, if air is trapped, is released after a few cycles od pump and release. In my case I simply wanted to replace the fluid. with each pump and release a quantity of old fluid was pumped out of the system. After five or six cycles the master reservoir was runnign low on fluid so that was topped up. The topping up is down to ensure air is not introduced from in to the system from the top. The pump, release and top up cycle is continued until the fluid being pumped out at the bottom is clear like the fluid introduce to the top of the system. The master cylinder reservoir cap is refitted.

Although I did not ride rthe bike straigth away I could tell the replacing of the clutch fluid had had an effect. There was a lot less free movement in the lever and it felt firmer. I do not anticipate any operational difficulties. 

NB...

make sure in all this exercise you protect the paintwork from drips of clutch fluid. It eat paint for breakfast.

I had one other job to do then the belly pan was refitted.

Wednesday, 22 July 2020

Wire in the Sat Nav

   When I got the Pan the first ugrade I wanted was a Sat Nav. The Sat Nav in my truck is not waterproof and not compatible with motorbike mounting systems. However this upgrade was not the most important. A number of other jobs where in the queue both this gadget.

   It took ages to research which Sat Nav I should buy. I had a budget for a middle ground Sat Nav. I do not need world coverage and lots of bells and whistles but it had to be bike orientated. I spent lots of interent time trying to find recommendations for the gadget that fitted my budget and specification. I have been watching a YouTuber call Itchy Boots. Click HERE for her website. She uses a Sat Nav. I looked up the model she uses and found it was not expensive and if you linked it to your phone you could get live updates. This function, if built in, really ramps up the cost of the unit. This unit is bike friendly and waterproof. If it can take Noraly round the world, it can trundle me round the UK.


   The unit I bought was a Garmin 396 (its what Noraly uses). I searched on-line and found Sport Bike Shop was doing a deal on them. So a unit reserved online and collected at the weekend of the same week from their shop in Milton Keynes.


   It also has included in the box were two power lead options and several mounting solution based on the Ram mounting system. Handy because:
A.Its included in the price
B. One of the first things I bought was a Ram. I knew I would have a Sat Nav eventually so when I saw a bargain I snapped it up.
I fitted the Ram mount when I fitted the risers. You can read about that HERE


RAM Mounts
   
Obviouly I chose the RAM mount that suited the RAM mount I had installed earlier. It is just a clamp with a ball grasp at both ends. Having decided on the mounting method next was powering the unit. The obvious choice was the mount that allowed for the quick removal of the Sat Nav and the automatic and weatherproof power connection. The quick fit Sat Nav mount just clips to the back of the Sat Nav. You then have to fit the mounting ball plate which joins the quick fit plate ot the RAM mount. During back plate fitting exercise you have to install the power lead. It all fits together very easily. Next the straight clamp joins the two ball mounts together supporting the sat Nav at the same time.


    Then the power lead is threaded down the handle bars. I used the clutch hose as a guide and used the hose guides to keep the power cable tidy. Initially I thought I was going to power the Sat Nav off the distribution board but a thought better of it and chose to have the unit powered through a switched feed. That meant the near side of the fairing had to come off to reach the switched power feed wire. Having gained access I stripped a section of the switched power lead and soldered on a short wire with a bullet connector on the other end. The power lead provided with the unit had a bullet connector fitted to the positive wire and a ring connector fitted to the negative lead. The bullet connectors were joined up the taped up the waterproof them. the negative tag was connected the earth point. With some difficulty the fairing was refitted. The Sat Nav sparks up when the ingition switch is turned on and goes off with the key.

   There is Smartphone connectivity via Bluetooth and Garmin’s Smartlink app which providers for :

  1. free live traffic and weather
  2. rugged, glove-friendly 4.3″ display
  3. adventurous routing
  4. service history log
  5. hands-free calling
  6. smart notifications
  7. built-in WiFi
  8. micro SD card slot
  9. LiveTrack
  10. the ability to send GPX files from your phone to the GPS and share them with other riders


   I just need to have a spin out on the Pan to decide the optimum position for the unit and try out all the features.


Tuesday, 21 July 2020

Power - Part 3

   To refresh your memory about the story of adding USB ports here are links the installments to get the final task; USBs, Plugs, Power & Power -part 2.

   In the last installments the relay was wired up and fitted. A long paired wire was left that would be the link the switch to the relay. A switch is a simple thing but it took me ages to find a switch that would fit on the bike. There is very little room for additional switches. One of Halfords cheap and cheerful rocker switches was selected. a hole was drilled out in the fairing just below the off side fairign pocket. It is the only flat surface in front of the rider. The switch does not need fiddling with so having it mounted on the throttle side does not matter.

   The seats were removed. It seems every job starts with removing the seats. I removed the securing bolts for the tank and propped up the tank to enable me to route the switch wire. Luckily I did not have to remove the fairing. So I was ready. however I left myself in a quandery. I needed a live power feed and a earth to create teh circuit for the switch to activate the relay. It would hav ebee easy fit ring connectors on to the end of the wires and connect them the battery terminals But that would look naff as the battery terminal already had the extra connector for a relay and one for the charger. I decided a different approach was needed. I removed the carefully wound insulatation on the relay power feed and earth and stripped back the wires insulation to reveal the copper core. The red relay switch power feed was round around the relay power feed wire and the two soldered together. The joint was then wrapped in insulating tape. That gives power to the switch side of the relay. I then stripped back a length of relay switch wire on the switch twin core cable and patch one wire into the earth side of the relay feed. These two connections are just about invisible and reduce the connection tags on the battery. now the trick job the return side of the switch wire has to be connected the negative side of the relay switch feed. This required a jumper link. in was a fiddly job but mainly because getting the shrinck wrap to stay on position whils the wires were soldered was a faff. once the wired were joined the shink wrap was positioned and heated. It made a nice tidy and hopefully a premanent weatherproof seal. The wires were tucked neatly behind the battery. With battery end sorted it was a case of routing the switch twin wire cable from the battery area to the fairing pocket. This meant getting under the tank. That turned out to be the easiest part of the job as there was already a cable run and with the tank tipped up the new switch cable fitt easily in to the run. It also gave access to the back of the fairing. it was a simple job the feed the cable through the switch hole, which had been previously created and ready for the final fit. The cable was cut to lehgth and wire core cut the length and stripped. After a dry fit and test that he switch activated the relay (it did), shrink wrap was fitted over the wires, the wires soldered to the switch tags and the shrink wrap fitted in place the heated up to give good clean finish. The switch was simply pressed into place.

    Flicking the switch activates the relay which powers distribution board  and the attached USBs. The offside USB has a voltmeter so a flick of the switch gives the battery state. I have tried the mobiles via th eusb....yup they power up.

All I have to show for all the work is a little switch and a couple of hidden USB ports.    


Saturday, 18 July 2020

Clutch Master Cylinder

   The bike went through its annual MOT (Ministry of Transport) test for roadworthiness as a pass an with no advisories. Advisories being little jobs that need addressing to bring the bike up to MOT standard but not serious enough to constitute a danger to the safety of the vehicle. The testing bloke commented that the bike was a nice example of the marque and in really good order. That was nice to hear given the light restoration I had given it over the winter. He mentioned the action of the clutch lever in passing. I had noticed the bite of the clutch took a little getting used to. I remembered I had topping up the brake fuild in the reservior as a job to do. The fluid was just above the minimum marker. The screws in the reservoir cap were really tight so I put it to the bottom the list as the clutch was working just fine. Now I thought I would do that top up job.

I first got the screwdriver out again and tried the screws. Nothing moved. I did my usual trick of soaking the screws in 3in1 oil over a few days and tried the screws again. I only managed the round them off. I got the thread extarctor kit out. The kit is a series of what look tapered screws but with a left hand thread. The tool is screwed in the rounded hole which was the head of the set screw and turned. The thread bites and is supposed to release the screw....nope, the hole just got bigger. I got the electric drill out and found a drill bit a shade smaller than the head of the screw.


I very carefully drilled out the head of the screw to leave just the thread portion of the screw in position. I had to be very careful. The reservior cap and body the body of the master cylinder is made from a magnesium alloy which is much softer than the steel of the set screw. One slip could damage the cap or body. That would mean a new master cylinder, the sourcing of which would cost time and money. So far this job had cost £3.80. Patience paid off. As soon as the heads where drilled out the reservoir cap came away undamaged. The screw threads were still in the reservoir body. With some tepidation I turned the remainder of the screw with my fingers. The thread turned easily and were removed in seconds to my great relief. I was not happy contemplating stud extraction for the master cylinder body. The fluid in the reservoir look really dirty. I guess it has been in there since the bike was built in the factory. I used a syringe to remove most of it and topped up te reservoir with fresh clutch/brake fluid. The oil seals and space was cleaned and refitted. The reservoir cap was cleaned and checked that the new screws would seat in the cap. There was a lot of corrosion at the base of the set screw as it went into the master cylinder body. That was what was preventing the screw coming out. I put a smear of copper slip grease on the underside of the set screw before refitting it through the cap. The screw seated nicely. So that job was done. Whilst I was about ti replaced the screws in the front brake master cylinder. These screws came out with much effort. The new screws were copper greased and refitted. The work of a few minutes.

Whilst I was dealing with the clutch master I took off the clutch lever and actuating rod. These components were dirty but well oiled. I cleaned up the lever, rod and housing then a liberal dose of LM grease the rod was refitted into the clutch piston and the other end into the clutch lever. The lever was then positioned for the pivot bolt to be relocated and the securing nut fitted. The lever action feels a good deal smoother.

Three jobs ticked off the list and one added......change clutch fluid. 

Sunday, 10 May 2020

Power part 2

   This post should where has the power gone! When the fairing was refitted, the USBs were connected up. It was a real treat to see them work first time. The USB with voltmeter was particularl good. I turned the bike off and left it until the next time I was able to do some more fettling.

 
At the next visit I turned the ignition to be greeted with the sound of relays clicking and dull dashboard lights. I looked at he voltmeter and it was showing 9 volts. It occured to me that the LEDs onthe USBs had run down the battery over a week. I connected the batery charger and went away to think about the situation. I decided to test the hypothosis. Once the battery was showing recharged I pulled the fused for the USBs and sat back to see what would happen. I went back to the bile a few days later, using a multimeter i tested the voltage of the battery. It had dropped again but not quite as far. The new fuse box has LEDs to show when a fuse has blown. It was with some frustration I disconnected the power feed from the battery to the fuse board. The charger was reconnected. The voltage was checked after a few days. No loss of power and the bike would start on the button. Now what?


   It took a few minutes for the issue to percolate in my bonce but the action was clear. I need to switch off the fuse booard when it is not needed. I could wire a switch into the heavy duty power feed so the solution had to involve and relay. I had a suitable relay in the tool box. I changed the post terminal tag connect to the live feed wire from the battery to a spade connector. That connector went on the replay. I made a jump wire with a post connector one end of the 27amp wire and a spade on the other end. Now I had a relay in between the battery and the fuse board. The wiring was checked with the multimeter. there was no current getting the fuse board. I put two spade conectors on the wires of a twin cable and conected them to the switch side of the relay. I stripped the wires at the other end of the cable and touched them off the battery. The repaly and fuse board reacted when power was applied to the switch wires. So that works.

   The relay needs somewhere to live. Luckily the battery box has a handy size void at the rear of the box which forms part of the rear inner mudguard. It was a simple job to drill a hole through the mudguard, its plastic, and use a plastic number plate nut and bolt to secure the relay to the mudguard. I had measured the jump wire to allow the relay to be fitted in the void.  

    The only problem is that I now have to decide where the switch is to be fitted and what type of switch to use. Then I have to buy it. Then fit it.

   I had a suspicion the battery would not be capable of sustaining so many warning lights. the battery is tiny compared with that of a BMW which is essentially a small car battery rather than a standard bike battery on the pan. The difference is clear but now I have resolved the issue.    

Cleaning

   Despite washing, polish and painting of the running gear the bodywork and wheels still looked dull. They had been washed several times but it does not shine. I set to washing the wheel with Gunk, an engine degreaser Click HERE for website thiinking that would do the job. Things got serious when I got the toothbrush out. The Gunk was loosening the dirt but it need sone scrubing to lift the dirt off the wheels. Cast wheels with twin discs are fiddlily to clean. There are lots of nooks and crannies. Forty minutes of scrubbing had made a difference to the front wheel. It looked much better. The back wheel is not so difficult to get at so gunking and scrubing did not take so long or was as difficult. There is still some skin on my knuckles when I was finished. Washing off the Gunk with hot soapy water revealed some shiny wheels.

   I decided to try the gunk on the bodywork. There was quite alot of accumulated tar on the lower half of the fairing. I tried brushing Gunk on which had little effect. I then put sone gunk on the rag on gently rubbed the area. I was pleased with the results on two fronts; 1,the paint did not come off and B the muck did come off. The Gunk dissolved the tar and cut through the road dirty. With this discovery I went all over the body work with gunk on a rag. More hot soapy water the rinse off the Gunk and the job was done. The bike fairly sparkled. It made a nice job of th ethe crud that had built up on the headlights lens.

   The bike dried quickly in the sun so I thought "make hay". I found some T-Cut (click HERE for website) in the garage cupboard. I carefully applied the T-cut. If you are not careful you can cut right through the paint. I let the T-Cut dry and buffed it off. Again there was dirt ont he rag and the paint shone a little more. Whilst we are at it I might as well go mad I thought. I rummaged in the garage cupboard for Turtle wax polish (click HERE for website) . This was applied to the panels and allowed to dry then was buffed off. For the first time the bike shone. Metallic grey is not that easy it make shine been there was a clear difference between starting and finishing.

   The downside is that the smell of  Gunk lingers so we had a smelly garage for several days. My hands were filthy and there was buckets of water about so there are no photos of the cleaning session.

Exhaust system

   I had tackled the headers whilst I was dealing with the clean and paint of the engine after the service, Click HERE to read about that. The silencers had both been taken off at an early stage and parked up at the back of the garage. They where not in bad shape. a scratch here and there and just a bit grubby. They where quite clean because you can get at them easily so general cleaning is not a problem.

It had occured to me that once I broke the seals on the exhausts they would probably not be reusuable. The OEM exhaust clamps where it bit tired. I figured I would probably break them as I removed them and so I got a set of exhaust gaskets and stainless steel clamps.

   It took a bit of fiddling to get the graphite gaskets off the pipes. As expected they were destroyed in the process. I used wire wool to clean up the are where the gasket had been.

   The jobs was simply enough. Wash the the dirt off. Use Gunk degreaser for the heavy stuff, rinse with hot water. They where better but to finish them off toothbrush and Autosol (click HERE for website). The Autosol and elbow grease did a good of removing the barked on grime. The photo doe snot begin to do the job justice.

  The silencers were returned to their corner of the garage until they were ready to refit to the bike. Fitting them to the bike was a doddle. The gaskets slipped on snugly, I was very careful with them. I remembered to slip the clamps over the pipe beforejoining up the silencer to the header collector pipe. The mounting bolts went strightin, with a dab of copper slip to help get them out if they ever come off again. The clamps were nipped up. Lter when the bike was run there were no leaks fro the exhaust.


POWER !!

   These big touring machines, like the Pan, have lots of options for accessories. In my case I have a bunch of options on my wish list.
  • USB connection to charge my phone seems a no brainer. If we are having one then lets have one in each fairing pocket. 
  • A power connection for the Sat Nav (I don't yet have)
  • An accessory power port
  • Heated seats are a possiblilty 
   There is a connection in the left hand fairing for accessory power. You have to but a wiring sub harness called a quartet harness. Unfortunately I do not want the accessories designed by the harness. I had a fish round tinterweb and came up with a small fuse panel. This is a fancy one as it has a LEDs which light up when the fuse fails.

   It took quite sometime to work out where the fused board would fit. After much trial and error I found the board would fit neatly in the tail piece. There is even a rubber strap to secure the unit. The strap is really for the Ignition Control Unit (ICU) which the Fused board sits on.

   I ran a 25amp rated twin wire cable from the battery to the fuse board. I crimped round post connectors to fit on the battery terminals. From the fuse individual twin wire cables were run to the back each of the fairing pockets. There they connected with USB sockets. The cables were neatly run and tied down.

Click HERE to read about fitting the USB sockets.
Click HERE to read about connectinghte wiring using new plugs

   It was not a complicated job once the thinking part of the design was done. Routing the connection around the fuse board is not as neat as I would like but then the fuse board is dsigned for a boat not a bike.

Sunday, 15 March 2020

Plugs

   I installed two USB units, one in each fairing pocket and there is controller for the heated grips. The fairings will have to come off again in the future. So I thought worthwhile in investing time to fit electrical connector plugs to make that job easier and it would look smart. The plugs would lead back to a fused distribution board. The fused board would take a feed directly from the battery and let me add more equipment in the future without overloading the factory fit electrical system.


I got a box up of 2,4 & 6 way plugs. I had not used these wire connectors before. However I did know that of you push the brass connectors into the plastic housing they are designed to lock in place. It took about twenty minutes of investigation to work out how everything went together. I got the soldering iron ready along with the wire crimps. Crimping the brass connector to the wire should be a sufficiently secure join. I decide a dot of solder would be properly secure the connection. I also had a quantity of heat shrink tubing.


 I decided to tackle the complicated connection first. First up the heated
grips controller. To make this a trial I could not find a wiring diagram for the grip and switch. The grips have three settings. off, warm and hot. I had the presence of mind to take a photo of the original connectors for reference. The live feed had been bodged of  the switched wiring loom. I was able to cut the wire back, removing the bodgery. I slipped the heat shrink sleeve over the wire. I stripped back the old wire and the end of the new wire. They were twisted together and soldered. When cool the heat shrink was put in place and heated with hot air. The join is properly secure and weatherproof.


   The earth wire was quite short. I remove the ring connector bolted through to a fairing bracket. I got a new ring connector a crimped, soldered and heat sleeved to the new length of wire. I went very steadily whilst I worked out now the make the connections into the plug blocks. The first block I tackled, for the heated grips, needed jumpers as well. After a false start the grip heated on demand. I used a little building mastic to weatherproof the back of the blocks.


 Once I had tackled the heated grips x6 plug it was a much more straight forward affair to organise x2 plugs for the two USBs. The extra work that took time was routing the power cable from the tail unit to the USBs in each fairing pockets. I used plenty of heat shrink and mastic. The back of the USBs are in a vunerable place inside the fairing.

See blog the about the accessory power panel click HERE

See blog the about the fitting the USB units click HERE 


Tuesday, 10 March 2020

Front Suspension refit

   The fork legs were set aside after fitting new seals but not for long. Click HERE to read about the fork seal replacement. I washed the sliders down with degreaser, then rinsed with water. When they were dry I rubbed them down with emery cloth to remove any rough patches. The intention is not to polish the sliders but to provide a key for the paint. I masked up the new seals and chrome stanchion. Then a can of gloss spray enamel paint was sprayed on in thin coats over a few days. The result is smooth and shiney. That should prevent the road dirt sticking and make cleaning easier.

   Whilst the suspension was out I set about cleaning the front brakes. The brakes are linked to the back brake and visa versa. With free access to the brake calipers it was a straight forward job to remove the brake pads then scrub everthing with degreaser. Each caliper had six pistons. Each one was pushed partly out by squeezing the brake levers. Then it was a case of scrubbing the compacted road dirt from the pistons. Easy enough, it just took some time and effort. With the pistons moving easily I turned my attention to the elements of the brake carriers. These just need a good cleaning and greasing where appropriate.

   The rattle can got a shake up and thin coats of enamel were sprayed onto the carriers avoiding the moving elements. With the calipers drying the brake pads were cleaned with brake cleaner and a toothbrush. In due course the pads were fitted to the caliper. A little copper grease was applied to the end of the pad securing pins. The front end was now ready to be reassmbled.

   There is a left and right fork. The dirt deflector was fitted to the top of each slider. Each leg was identified and slide through the bottom yoke and in to the top yoke. The top edge of the stanchion was lined up with the top face of the yoke and the pinch bolts tighened. In the interim the front wheel fender had been cleaned, inside and out. New clips had been fit where necessary. The fender was offered in to its place. a couple of bolts were gently fitted. The front wheel was refitted but the splindle was not completely tightened. The brake assemblies for each leg were refitted ensuring free movement where required and secured where required. The brackets for the brake lines were secured. The remaining bolts were fitted to the fender and the whole finally tightened up. The wheel was spun to ensure it moved freely....It did!


Monday, 9 March 2020

Risers

   Having ridden the Pan for nearly a year it seemed to me the handlebars were just a bit far away from me. With that I did not feel completely in control. I knew from forums there were such thoings as handlebar risers. The risers raise the bars a little and moves them back a little. Luckily it did not require the wires and cables need to be extended. Brand new risers are somewhere around £180 to £230. I was luck to find a second hand unit for half the price of new ones.

Middle item is the handle bar damping plate
  
   As with other parts of the bike there was a fair bit of corrosion keeping the nuts and bolts which is probably what you want with handlebars. Fortunately I had sourced the riser before I started the job and the plan was always to tackle the risers whilst the forks were out of the bike. Even with the fairing removed it was still a ticky job. I was unfamiliar with the handlebar fitting. It turned out the handlebars are connect directly to the upper fork yoke. Some BMWs I have this feature. The feature lessens the road vibration to the grips. The handlesbars and decorative cover came off quite quickly, first having been careful to use lots of penetrating oil so as not to strip the heads of the nuts. Drilling out the bolts was to much to contemplate. The handlebars off the damper was visible however the bolts to secure it were under the top yoke. Even with the fairing and forks out of the way it was fiddly to remove the nuts. Once all the original parts were removed I cleaned and polished the top yoke.


   The new riser was put in place. You can see in the picture (left) the riser partly obcures the top the fork leg. This meant I would not fit the risers and handlebars until I had replaced the refurbished fork legs back in place. Fast forward to the fork legs having been fitted. The large bolts that secured the original damping plate fitted straight back through the new riser and were secured with the same set of rubber washers, metal washers, spring washers and nuts, all done upside down were you cannot properly see what you are doing.   


    The last job was to secure the three bolts in each handle bar arm and fit the centre cover. Part of the reason for getting the risers was to have a place to put the sat nav (when I get one). Another job closer to the MOT. 


Tuesday, 3 March 2020

The lights man!

   Not long after I got the bike and before this blog began I got the notion to fit LED day riding lamps (DRL). These lamps replace the indicators are white all the time until you switch on an indicator then the amber lamp flashes, returning to white when the indicator is switched off. More about that in a different blog. In the DRL kit was a pair of LED "bulbs" to replace the side lights next to the headlamps. Once installed LED side lights and the DRLs really showed up the main head lights as milky white instead of the crystal white of the LEDs. Something had to be done about that.

   I bought a set of NovSight N9/7 LED headlights. Note to self, look really hard fo rth einstructions. I did not find them until I had finished the fitting and the instructions had a useful piece of information. More on that later.

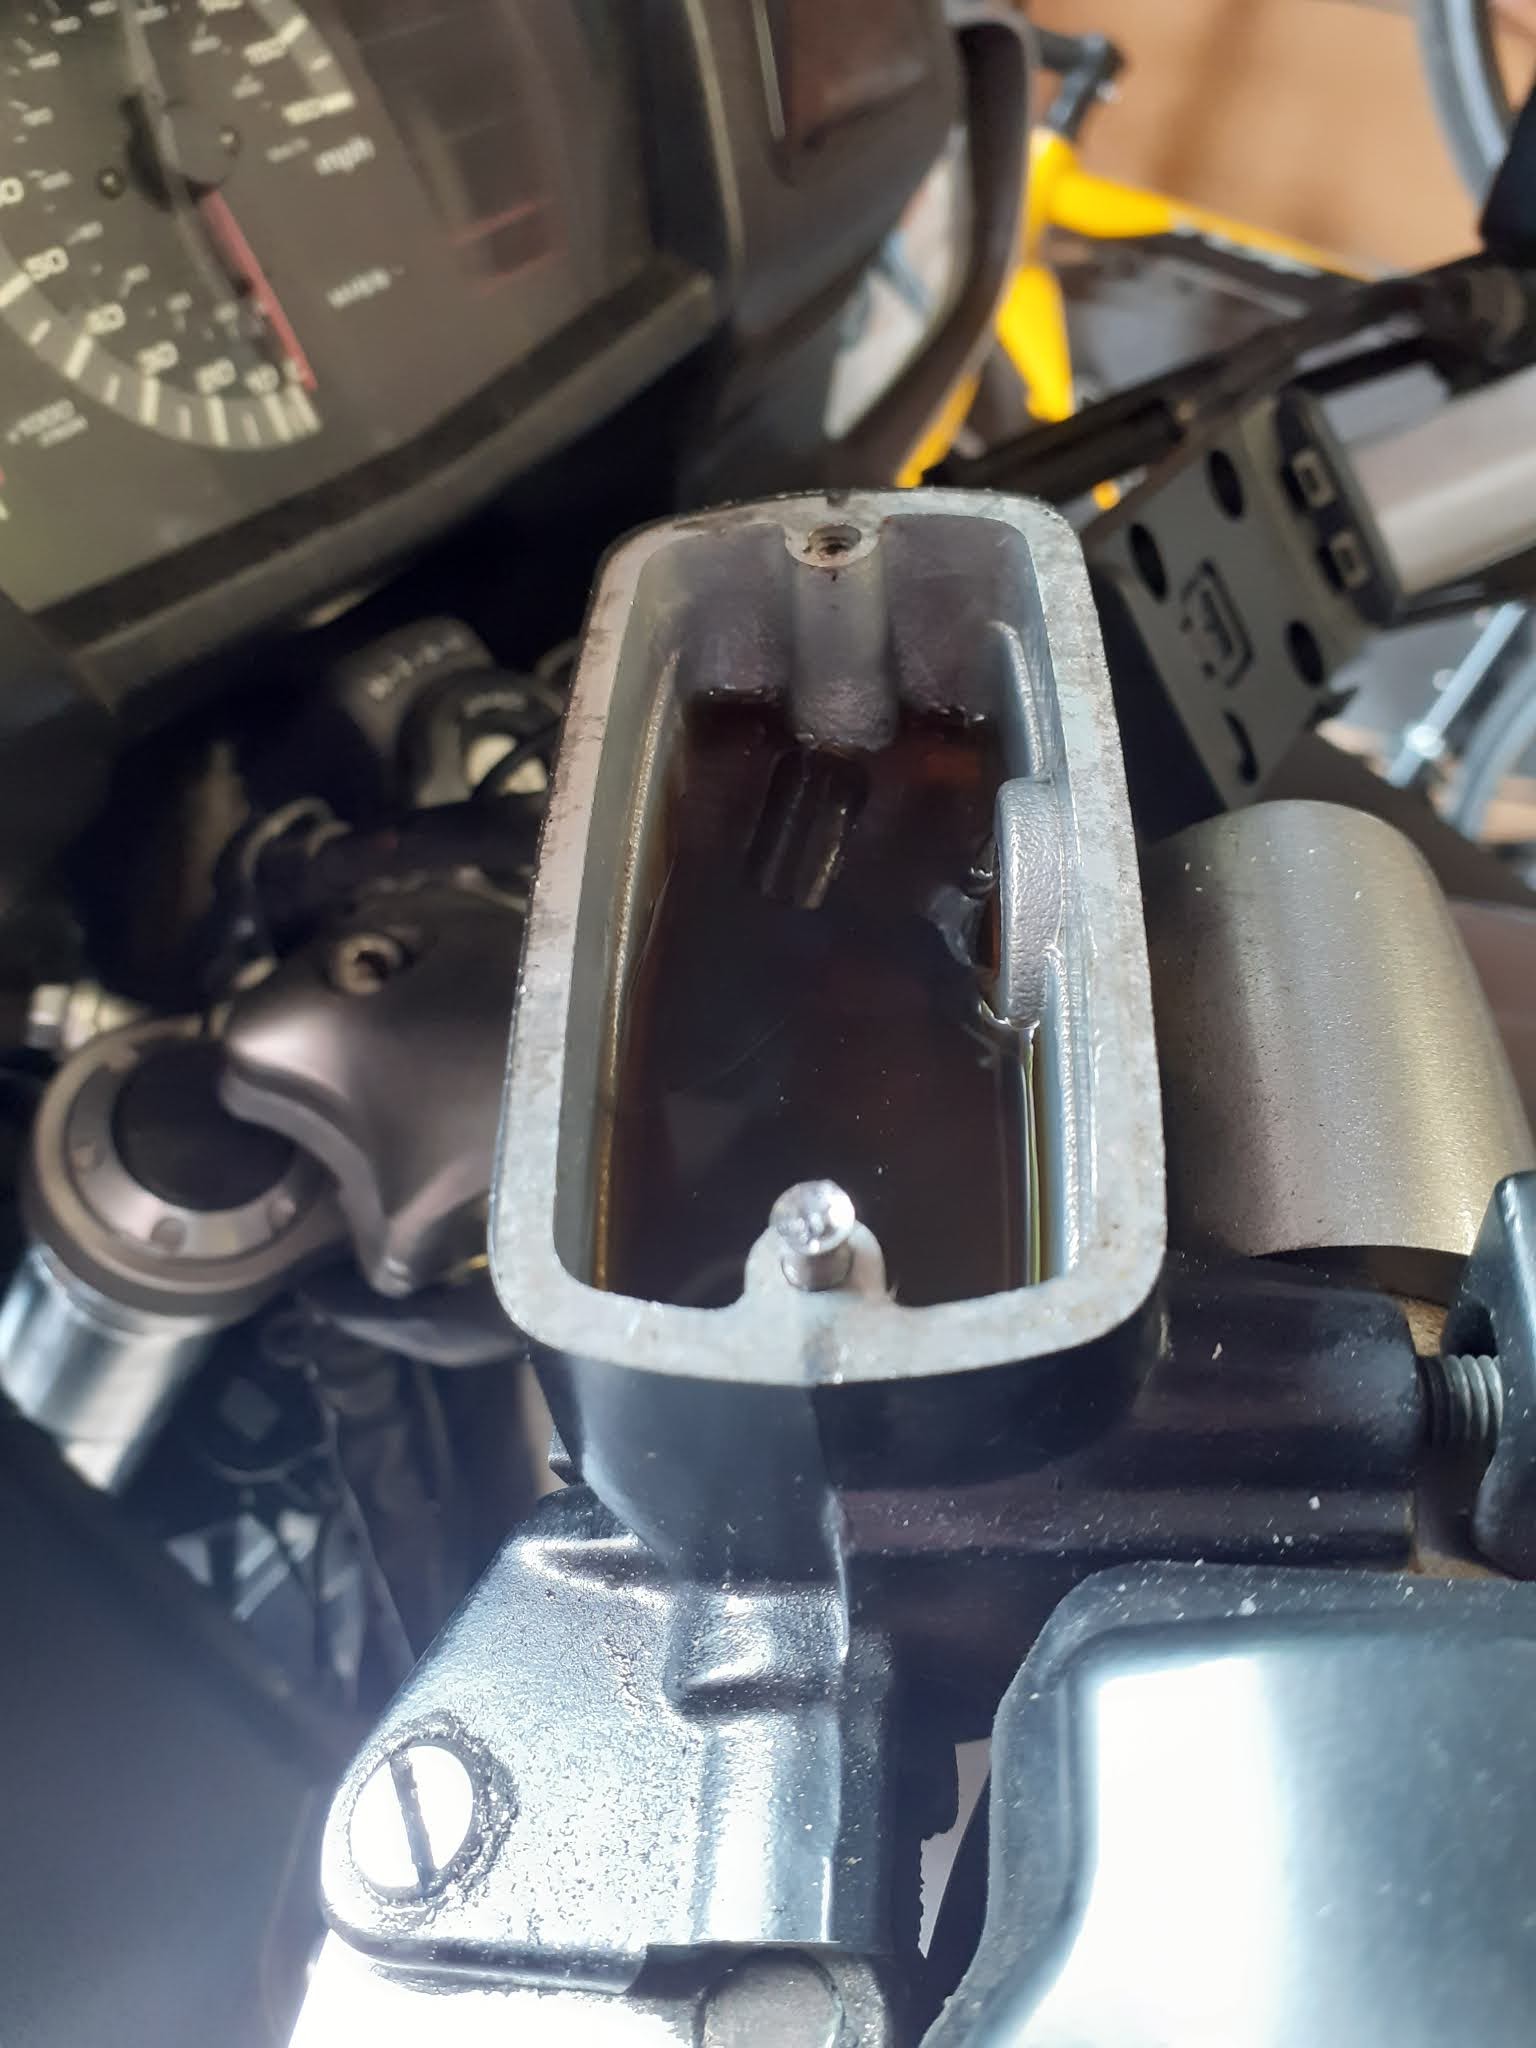
   I had replaced the new radiator but had purposely not replaced the forks. This gave me good access to the back of the head lights.

   Removing the existing headlights was not too tricky. Remove the rubber cover and flick out the sprung bulb retainer. One electrical connector would not come free from the back of the bulb and I ended up destroying the existing bulb. The new LEDs better fit now!


   Refitting the LEDs.....ahem. This was a right royal pain in the behind. Usually one would presents the bulb to the front of the rubber dust cover and the pronges of the bulb simply push through the rubber. The flange behind bulb locates into the headlight housing and provides a surface for the retaining clip to press upon. That 's normal bulbs work.


   LEDs, however, have a huge heat sink, fan unit and ballast resistor then the normal locating flange. This means the hole in the dust rubber is to small to for either fan end or the flange end of the LED. The fan end was the smaller of the two ends. I was able to feed the ballast unit through the hole. The fan would just not go through. I also had to be careful not to damage the LEDs. When my patience was worn thin I decide to make a small cut in the hole of the dust rubber. The cut got bigger as the fan was forced throught the hole. In the end the rubber sat correctly but because it was between the fan and flange there was not much room to fit the retaining clip. The bulb located quickly and correctly into the back o fthe headlight housing but it several attempts to get the spring clip located properly because the rubber was inthe way. The rubber seated into it location. The question is will be be weatherproof. Only time will tell. The long tail with the ballast was zip tied to the fairing supports and the electrical connector plugged in. The second side was a bit easier as I had already tackled one side. As usual it was on the left handed side.

   The headlight switch was was flicked......bloody hell they are bright. I was pleasantly surprised to find there was very little lag when selecting on, high, low and flash switches. When I get the bike on its wheels and outside I will have to be careful with aiming the headlights. I could blind someone with those things.
 
  Here's the rub. I found the fitting instructions in a daft place in the presentaton box. Reading the instruction showed the flange could be unscrewed to allow the bulb to slide through the hole in the dust rubber. The flange is then refitted to the LED...doh and doh again. 


Monday, 2 March 2020

Two tone


This painting element has been a bit of a creeping project. To begin with  I thought I would spruce up the crash bars because they had a bit of rust on them. A wash and rub over with the spinning wire brush,  they looked quite good after a can of paint had been spray over them in a series of coats over a week.


 Then I decided that a colour change was in order. I would have prefered a white Pan but a silver version is what came my way. I have discovered that many Pan owners have issues with the finish on the castings which make it tricky to keep shiney. With that in mind I decided upon a course of action. The silver body panels and major frames elements would remain silver but the engine, forks and swing arm would be painted black. The wheels are already black. The look will be two tone. The tops silver and the bottom black. This was only decided upon after I had painted the crash bars and the front of the engine.


   Whilst I had the body panels off I gave everything a good wash, first with engine degreaser (Jizer) then a power wash. When all was dry I was going to hit the engine with a wire brush. I had done the front of the engine but a problem occurred....the exhaust headers were in the way. I oiled up the jubileee clips connecting the headers to the exhaust silencers. The silencers came off much easier than I expected. I soaked the header bolts in oil and after a few days they came off without damaging anything. There is always the threat the bolts or nuts will strip or damage the threads. The repair is always expensive in time, money and is often a less than perefect repair. Replacement header and silencer gaskets were orders and was stainless steel silencer clips to replace one OEM versions which after 15 years were looking a bit tired.

   The big round wire brush took care of the flatter areas of the engine body and the small pointy wire brush took care of the tight spaces and webbing. A wipe down to remove the dust, a spot of heath Robinson masking and it was time to get the rattle cans busy. I bought high tempreature gloss black paint. Two full cans were applied in coat to the exposed engine. Once dry the the surface of the casing was smooth with paint. It should be much easier to keep clean and it should stop the alloy casing corroding any further. It looks smart too! 

   It was a fiddly job to fit the new header gaskets but once the first one was positioned and the nuts started on the studs it was an easier job the fit the other three. The exhaust header nuts were tightened up.

  The next job was to refit the radiator. See Return of the Radiator. The crash bars were refitted. The refurbished fork legs had been set aside and now it was their turn in the makeshift spray booth for some rattle can action. Another can of paint was applied in thin layers. The finish is smooth. They should not hold the road dirt as much as the standard finish. Any brake lines and brackets got the paint treatment at the same time and for the same reason. When the paint was dry the forks were fitted back onto the bike.


Whilst I was at it I went through the same cleaning and paint process on the side sand and main stand. 

Monday, 24 February 2020

Return of the Radiator


   Getting the radiator back from the firm that repaired the radiator was a bit of a trial. They were located about 25 miles from me so I was able to "pop over" and have a word. I finally got the radiator back after three weeks. The repair firm had got hold of a curved core. They then tried to mate it to the existing headers at each end of the core. They headers were shot. The Aluminium had corroded to a state were they would not weld. Sam, the technition, who was doing the work set about fabricating and pair of headers. The manufacteurers headers are usually quite flimsy pressed Aluminium. Sam made a set from plate Aluminium. As it was plate it is much thicker, which I guess makes it easier to weld. The welding is not machine quality but I do not mind. It is hand made.


    On the appointed day of collection I went over the Wednesbury only to find the radiator was not quite finished. I had to kick stones for a few hours. On my return the radiator was ready, paint still tacky.


   The next job was to refit the radiator back on the bike. It was then a noticed that Sam had made brackets to replace the corroded items on the original radiator. First job was to refit the fans to the back of the radiator. Stainless steel clip replaced the originals. The left fan went straight on. The right fan did not quite locate onto one of the brackets. Twenty minutes of careful drilling and filing and the bolt lined up. The lick of spray paint to protect the new cut surfaces, replacement clips and the radiator was ready to be refitted. The bolts that retained the radiator were a but rusty. I gave the a brush with the wire brush and spray of paint and they too were ready for the refit. I offered the radiator up and refitted the bolt through the top brackets. The side brackets located smoothly. Well done Sam.

   One of the my rebuild rules is that any refitted bolts get a cleaning and a dab of Copper grease upon refitting. Depending on the situation the fitted nuts get a slavering of ordinary grease. That should keep the weather off for some time. The hose spiggots lined up perefectly which made refitting the hoses a doddle. I replaced the original hose clamps with a stainless steel option. The electrical plugs for the fans were reconnected and secured to their respective brackets. The header tank was refitted to its off side position and topped up with premixed coolant. The radiator was filled with Putoline NF premixed coolant.

Running the engine up to tempreature to vent the system would have to wait until I refitted the front wheel and suspension. 

Putoline NF coolant Volume = 2.5 litres including header tank.


   If you need your radiator recored you could do a lot worse than West Mercia Radiators. They are a bit chaotic but I suspect that is because they in demand. They honoured the price they quoted even though did extra work fabrication the headers.


Thursday, 13 February 2020

USBs

   Whilst the radiator was away for who knows how long I set about other jobs. I wanted to put USB ports in each of the fairing pockets so I could charge things. In order to get the pockets in a place to work on them the faing would have to come off. The fairng fastenings are notious for snapping so I sent off for a fastnering kit. A bag full of shiny stainless steel and plastic goodies duly turned up in the post.

   I referred to the manual the locate all the poppers, clips and bolts that held the fairing together. slowly but surely the poppers popped, clips unclipped and bolts unbolted with varying amounts of resistance. The near-side panel has a big electrical connecting block located on the fairing but it under the fairing pocket so was difficult to undo. I do not know how that will be refitted! Then there were lots of plastic panels filling up the garage, two large panels, two inner panel the belly pan, the front lower grill (which did not come off without a fight). Then the large panel had to have the fairing pocket removed. The upper dash fairing also had to be loosened to allow the pockets to be removed.

   Once the fairing pockets were off it was a resonably straight forward job to drill a 30mm hole in the front of the pocket and fit the USB units. Before final fit of the USB unit I coated the thread and both sides of the new hole with waterproof mastic. Having first remembered to fit the rubber dust cover, as I tightened up the nut to secure the unit to the pocket the mastic oozed from the joint making it watertight...I hope. I cleaned up the mastic then refitted the pocket back onto the fairing panel.

   One nice touch was I found a USB unit with a built in Volt meter. Now I can tell the state of my battery.


The lower front grill was cleaned up. The old clips were replaced with the new stainless steel items and heavily greased ready for refitting.


Radiator - part 1

   Whilst riding the bike over the summer I decided that the engine was not coping with the heat as the raditor fans would come on as soon as I slowed down coming into town or was in traffic. This did not seem right. I check the coolant level. It look a little low. I looked at the raditor itself and found it was largely clogged with years of road filth. I decided it needed sorting.

   Removing the radiator was quite simple. Drain the cooling system, remove three hose clips, a bolt in each bottom corner and a long bolt through a cushioned bracket top centre of the radiator. The radiator has two fans so the electrical plugs for these needed unplugging. Since I was going to wash the radiator I needed to remove the fans, three bolts on each fan. Five came off fairly readily. The other one snapped the bracket. Once off copious amounts of oil and wiggling freed up the nut and bolt and remainder of the bracket was free. I decided if I soaked the radiator I would be able to loosen the dirt and would come out with a jet wash. The result in short, after several evoltions of washing and poking the dirt, was that the dirt did not budge and fins were getting bent over. time wasted and probably in a worse place than when I started. Also the paint had come off the ends of the radiator and the Aluminium was powdery where it had begun to corrode. The fan bracket broke because it was corroded. Time for a think.

   I researched the cost of a new radiator.....700 of your English pounds plus postage please. That was almost half the cost of the bike. A plan "B" was needed. As luck would have it I had attanded a classic bike show during the summer and picked up a card for a chap in the West Midlands that refurbished radiators. I gave him a call. Short conversation about estimated costs and when I could have it back (when I called him he was on holiday in Portugal) I posted the radiator off to Wednesbury. The clock started ticking.

Whilst the radiator was away I started another job. 

Now things get serious - Fork seal replacement

   The driver for this refurbishment is to replace the oil seal on the off-side front fork stanchion. That is the primary job. As I go along I will clean and refurbish anything else that needs it.

   Job one is all about the front of the bike. I have a bike lift which is handy as I can raise the bike to any working height. The bike was raised and a jack put under the front of the engine to support it once the front wheel is removed. It returned out the jack has some kind of oil leak so it very slowly decended under the weight of the bike.It dropped a couple of inches over night. Luckily not so much as to make the bike pitch forward and fall off the ramp. Finding this heart stopper made in me use a racket strap through the rear wheel and looped around the ramp base. Once tightened up the back wheel was strapped down. And it stayed that way.

Preparation
   With the wheel up in should be straight forward the release the brake calipers, remove the wheel spindle and remove the wheel. Straight forward it was not. I had taken the precaution of covering all the bolts in penetrating oil, whilst being careful no to get oil on the brake pads. The bike has linked brakes and was determined not the drop hydralic fluid out of the brake system which would require me to refill and bleed the system. I understand it is a nightmare job. I took a few pictures to see how the linkage was set up. I carefull removed all the bolts until the calipers were able to be swung away from the brake disc. In order the remove the forks the front mud guard needed to be removed. More penetrating oil on the grimy nuts that were on the underside of the mud guard and therefore exposed to years of road dirt. there were more brake related brackets tangled up with the mud guard mounting. Following a struggle and more oil the seized nuts and bolt began to give and were finally removed which released the mud guard. By the time I got to this stage it was clear, give the up grades I had in mind, That would need to remove all the front fairing panels and some of the up dash panels.


   The crimp bolts on the upper and lower yolks were surprisingly easy to access. On each side there four bolts; two on the upper yolk and two on the lower yolk. There is a 20mm hexagon key in the top of each stanchion that secures and provides compression for the suspension. These nuts are usually difficult to undo as they are rarely undone, are under pressure and when off the bike there is no purchase to counter the turning motion needed to unscrew the nut. I decided the loosen the 20mm hex bolts whilst they were in the bike. Guess what? They It undid very easily but being careful not the unscrew it completely. Each fork was slid down through the yolk, the fork cap removed and the fork oil drained out. Both sets of oil were filthy and of course there was less oil in one fork than the other. Also remember to catch the spacer, washer and spring which will fall out when you upturn the stanchion to drain the oil.

Removal 
   Then began the trial of removing the oil seals. Each legs was tackled in turn. There is an allen key at the bottom of the legs which secures the bottom of the internal suspension mechanism. It is in the ticklish spot. A long reach allen keys is required and potential to damage the head of the key is high. If damaged the bolt is never coming out. As luck would have it, although very tight the bolt came free. The dust cover is prized from it position revealing a circlip. The clip has to be removed to allow the seals to be removed. There are two on each side. Removal of the seal is done by sliding the lower suspension leg (the slider) down with a sharp movement until the internal suspension bush hits the underside the of the seal and slowly drifts the seals out of position. Note the anyone else tackling this job, do not allow the suspension bush to come out of the slider. It took me ages to get back in. It is quite soft so damages easily and is sprung to grip the inside the slider. With this knowledge the second legs was quicker to service. The old seals are taken off the stanchion (upper section of the suspension).

Reassembly
The stanchion then slid carefully into the slider, the spring is refitted followed by the washer and the spacer. The new seals come with a grease which is used to ease the passage of the new seal down the stanchion the preserve the sealing edges. The seals need to carefully tapped into place and the circlip refitted. The new oil is measured out and poured into the stantion. The suspension needs to gently worked up and down several time to expel any air trapped in the galleries. With oil topped up as necessary. The 20mm hex is is screwed back in to the top of the stanchion. The thread is fine and the suspension spring provides a lot of resistance so one has to be careful not to cross thread the Hex bolt. I tightened the Hex bolt as best I could and noted that it need fully tighening when it was back in the bike.

The same procedure was carried out on the second legs. It took about four hours to complete the work described. The sliders are going to be painted so were set aside and the next job got ready for another day. 
          

Monday, 10 February 2020

Starting with a service

   There is nothing really to say about the service except it is easier if you take the fairing panels off. The underside panel comes off real easy which is not something that can be said of the front side panels. Behind the near side panel you find a big electrical connector block which has a mounting on the panel. This means the panel does not want to come off until the block is released but you cannot get at it as it is under the fairing pocket. The off side panel does not have quite has enough space to remove the suspressor cap on the rear most cylinder.

   The spark plugs are deeply recessed so a little care in starting the tread is needed. I used NGK spark plugs. Despite being brand new I always check the gap with a feeler gauge. Often the plug needs a slight gap reset the gap. The air filer is a faff because it is under the petrol tank. Luckily the top tank was empty so was light. The tank has a prop which stowed in the tail unit. Unfortunately I did not find this out until I had completed the job. To make the job a bit more interesting several of the screws would not come out. I did coax them out with penetrating oil and a little time. It is nice in this restoration/upgrade that I am not pressed for time. I can oil seized screws over a period of time and work them loose. The change of air filter took 90 seconds but get the air box lid off took a week. Refiting the air box lids took no time at all.

   The oil filter was an easy job. Running the engine up to working tempreature obviously took a few minutes. I cannot run the engine whilst the bike is in the garage so the warm up took place outside the garage. The oil is not going to cool down fast so there was ample time to reposition the bike on the lift in the garage before dropping out the old oil. The oil filter is under the engine near the centre stand. Access is a bit restrictive but not as bad as other vehicles I have worked on. Fitting the new oil filter is a work of seconds.

   I figured whilst I was about it I might as well replace the oil in the rear drive bevel. That might have been the simplest job of all. Remove the drain plugs and let it drain. The oil is a heavy EP90 so it does not flow quickly. Once the oil was out. Replace the drain plus and squeeze in the appropriate amount of oil in the filler plug. When it overflows you have filled it.

Service fuilds
Engine with filter change                 3.9 litre           SAE 10/40
Final drive                                      0.15 litre           SAE 80

Spark plugs                                      NGK               gap = 0.8mm


Sunday, 9 February 2020

Top box plate

The Pan came with a Honda top box and a mounting plate. I don't have much room in the garage so I figured I would mount the top box then it would be on the bike, out of the way. Usually I do not care for a top box when riding so it was going to be a storage thing.


Pan European ST1300 side onThe fitting kit was complete. I had to visit the interweb for fitting instructions. It was not complicated. Remove the seat. I had to remember now to do that. Insert six bolts into oblong guides and insert these into the mounting plate and offer the plate up to the existing rack. Guess what? there are bolt holes that line up so it was case of wiggling the bolts into their respective locations and moving the plate around until it was square. The a bit a pin the nut on the bolt as the bolts protruded into the space under tail piece and of course you can see anything under there so it has to be done by feel. Its a faff but simply enough.

With the plate fitted, the top box simply engages with the plate and the clip and lock of the top box secure the box to the bike. I have found if a run about with top box on, when I get where I am going I can put my helmet in the top box and boot and jacket in the panniers so I stroll around without getting hot in bike gear. The other aspect is that without the top box the plate looks a bit untidy. 

Hazel the pillion reports the back rest on the box is quite comfry. As a rider I can tell it has not fallen off and does not appear to affect the handling, even with a box of honey in there.

Friday, 7 February 2020

A review

   The first thing I did after riding the Pan back from Manchester in the pouring rain in November 2018 was to go a get some new riding kit.
  • A pair of Sidi adventure boots
  • A HJC helmet. Aria helmets are over £400 quid !!
  • An Alpinestar two piece Andres Touring textile suit. 
  
   Then I rode the thing. No problem to go fast, slow or stopping but I had trouble turning right. It really did feel odd given the test drive was so positive. So time for an investigation. It did not take long to discoved the tyres pressures were a bit low. Pumping up the tyres improved things but it was not a transformation. A further look showed the right fork seal was leaking. Job one.....new fork seals. I might as well do both at the same time. I closer look showed the radiator was pretty clogged up from crap from 15 years and of 33k of city riding. Riding the Pan in the summer had the fans coming on when tootling through the cities. It was not so hot to call for fans. Job two then. So given the fork had to come out to do the seals that would leave room to do the radiator want else should I repair/up grade whilst the Pan is on the ramp? 


I made a list:  

  • I figured all the plastic fairing fasteners would break as soon as I touched them so a set of new fasteners would be needed.
  • A service would be in order. 
  • Tyres are OK. 
  • The bike came with a top box but the fixing plate was not attached  so the top box could not be fitting to the bike. That needs sorting.
  • So what about some USB ports to charge phones and run Sat Nav? That's a good idea. 
  • There was a lot of corrosion of the Magnesium alloy of the engine block as I figured that needed looking at. 
  • The drive splines on BMs are a weak point The that is going be part of the service for the Pan.
  • I had seen that a common up grade was LED day light riding lights. They really make the bike visible in traffic.
  • A heated seat would be nice. 
  • Perhaps handlebar risers and liners for the panniers and top box. 
  • A deep clean
Now time to go shopping
   

It begins !

A bit of background.
I have had loas of bikes. Currently I have a couple of bikes, a BMW 80/7, a Yamaha R1 and a Honda CX500 in bits. several years ago I had thought about getting a new touring bike and had been for test rides on BMW GT K1200 (The BM) and a Honda Pan European ST1300 (The Pan). The BMW had lots of toys, cruise control, remote suspension adjustment, heated grip, heated seats, motorised screen and a funny front end. The Honda had a big fairing to sit behind, a tidal wave of torque and was comfy to ride, heated grips and motorised screen. The Honda was a bit cheaper to buy than the BM and cheaper to service.


The BM seem a bit slower to turn in and a bit slower on acceleration. I was dragging the toes of my boots on the tarmac in a very short time which underlines the confiedence given by the Pan and torque everywhere. The Bm looked quiet sleek and the Pan something of a bruiser. And that was backed up by feeling you where sitting "on" the BM and "in" the Pan.

It was all moot in the end as the price tags for either bike was somewhere north of £15,000.

Then in 2018 a Pan came up for sale which looked in resonable condition and with a price tag I could afford. It is a 2004 model with 33,000 miles on the clock, so not many miles. It is a bit care worn but it goes like and train and stops like someone stuck bar through the spokes. It came with a years MOT, new battery, heated grip and a Honda top box which was a bonus. The tyres are pretty good.

So very much plug and play. Now there is Pan in the garage!