Showing posts with label General. Show all posts

Thursday, 23 July 2020

Rear Brake Lever Pedal

   In motorcycling we are lucky that most higher specifcation bikes have adjustable hand and foot controls. The reach for the rear brake pedal was a bit far for my liking. Since I refurbished the brakes I have really had to stretch to apply the rear brake (for purists and the pedantic I know they are linked). Whilst I was working on the clutch fluid replacement (click HERE for that story)


   I decide the investigate adjustment of the rear foot operated brake. I found there was an adjuster. It is on the offside by the brake pedal. It was handy that the belly pan was off for the clutch fluid job. I squirt of 3in1 oil and a rub with the toothbrush released the grip of the rust. A 10mm spanner held the adjuster and 12mm spanner undid the locking nut. Once the locking nut was freed it was a straightforward job to twiddle the 10mm adjuster until the pedal was at the desired level. The locking nut was then....er locked.


   The next job which, is often over looked, is to adjust the brake light switch. This switch is in the sme area as the brake pedal adjuster but is made of plasitic. So some care is needed. a splash of 3in1oil freed the threads. It was just a case of holding the switch body with a pair of pliers and spinning the locking nut until the stop light came on when the brake pedal was depressed. Its the little things.


With that jobs completed the belly pan was refitted.    

Saturday, 18 July 2020

Clutch Master Cylinder

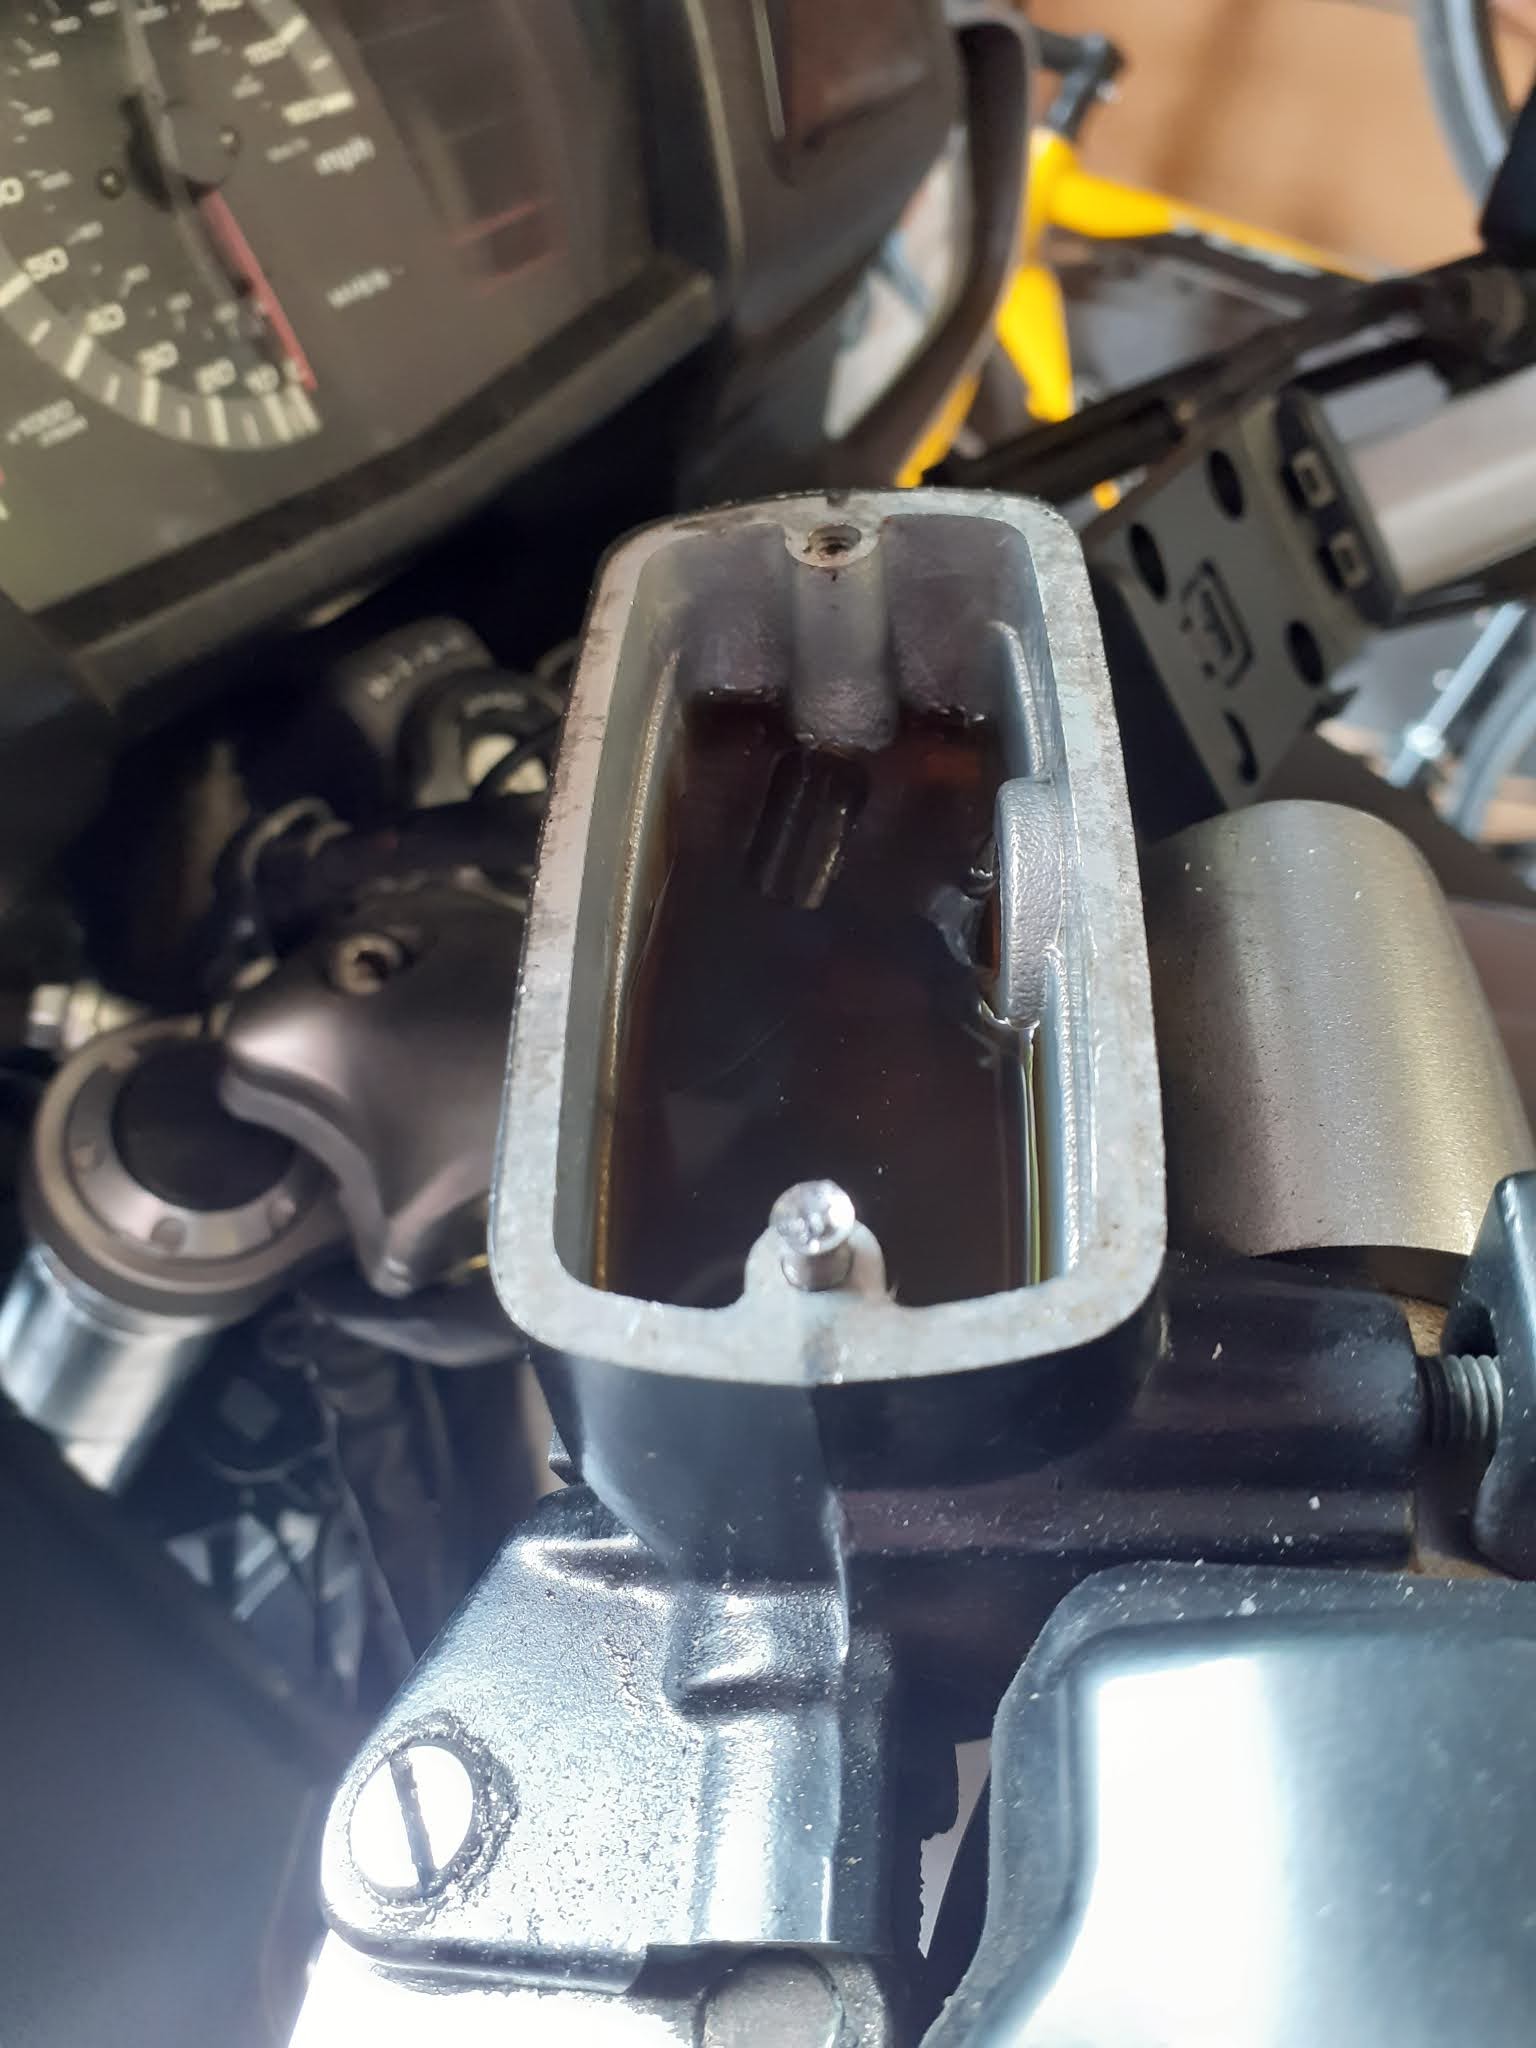
   The bike went through its annual MOT (Ministry of Transport) test for roadworthiness as a pass an with no advisories. Advisories being little jobs that need addressing to bring the bike up to MOT standard but not serious enough to constitute a danger to the safety of the vehicle. The testing bloke commented that the bike was a nice example of the marque and in really good order. That was nice to hear given the light restoration I had given it over the winter. He mentioned the action of the clutch lever in passing. I had noticed the bite of the clutch took a little getting used to. I remembered I had topping up the brake fuild in the reservior as a job to do. The fluid was just above the minimum marker. The screws in the reservoir cap were really tight so I put it to the bottom the list as the clutch was working just fine. Now I thought I would do that top up job.

I first got the screwdriver out again and tried the screws. Nothing moved. I did my usual trick of soaking the screws in 3in1 oil over a few days and tried the screws again. I only managed the round them off. I got the thread extarctor kit out. The kit is a series of what look tapered screws but with a left hand thread. The tool is screwed in the rounded hole which was the head of the set screw and turned. The thread bites and is supposed to release the screw....nope, the hole just got bigger. I got the electric drill out and found a drill bit a shade smaller than the head of the screw.


I very carefully drilled out the head of the screw to leave just the thread portion of the screw in position. I had to be very careful. The reservior cap and body the body of the master cylinder is made from a magnesium alloy which is much softer than the steel of the set screw. One slip could damage the cap or body. That would mean a new master cylinder, the sourcing of which would cost time and money. So far this job had cost £3.80. Patience paid off. As soon as the heads where drilled out the reservoir cap came away undamaged. The screw threads were still in the reservoir body. With some tepidation I turned the remainder of the screw with my fingers. The thread turned easily and were removed in seconds to my great relief. I was not happy contemplating stud extraction for the master cylinder body. The fluid in the reservoir look really dirty. I guess it has been in there since the bike was built in the factory. I used a syringe to remove most of it and topped up te reservoir with fresh clutch/brake fluid. The oil seals and space was cleaned and refitted. The reservoir cap was cleaned and checked that the new screws would seat in the cap. There was a lot of corrosion at the base of the set screw as it went into the master cylinder body. That was what was preventing the screw coming out. I put a smear of copper slip grease on the underside of the set screw before refitting it through the cap. The screw seated nicely. So that job was done. Whilst I was about ti replaced the screws in the front brake master cylinder. These screws came out with much effort. The new screws were copper greased and refitted. The work of a few minutes.

Whilst I was dealing with the clutch master I took off the clutch lever and actuating rod. These components were dirty but well oiled. I cleaned up the lever, rod and housing then a liberal dose of LM grease the rod was refitted into the clutch piston and the other end into the clutch lever. The lever was then positioned for the pivot bolt to be relocated and the securing nut fitted. The lever action feels a good deal smoother.

Three jobs ticked off the list and one added......change clutch fluid. 

Friday, 7 February 2020

A review

   The first thing I did after riding the Pan back from Manchester in the pouring rain in November 2018 was to go a get some new riding kit.
  • A pair of Sidi adventure boots
  • A HJC helmet. Aria helmets are over £400 quid !!
  • An Alpinestar two piece Andres Touring textile suit. 
  
   Then I rode the thing. No problem to go fast, slow or stopping but I had trouble turning right. It really did feel odd given the test drive was so positive. So time for an investigation. It did not take long to discoved the tyres pressures were a bit low. Pumping up the tyres improved things but it was not a transformation. A further look showed the right fork seal was leaking. Job one.....new fork seals. I might as well do both at the same time. I closer look showed the radiator was pretty clogged up from crap from 15 years and of 33k of city riding. Riding the Pan in the summer had the fans coming on when tootling through the cities. It was not so hot to call for fans. Job two then. So given the fork had to come out to do the seals that would leave room to do the radiator want else should I repair/up grade whilst the Pan is on the ramp? 


I made a list:  

  • I figured all the plastic fairing fasteners would break as soon as I touched them so a set of new fasteners would be needed.
  • A service would be in order. 
  • Tyres are OK. 
  • The bike came with a top box but the fixing plate was not attached  so the top box could not be fitting to the bike. That needs sorting.
  • So what about some USB ports to charge phones and run Sat Nav? That's a good idea. 
  • There was a lot of corrosion of the Magnesium alloy of the engine block as I figured that needed looking at. 
  • The drive splines on BMs are a weak point The that is going be part of the service for the Pan.
  • I had seen that a common up grade was LED day light riding lights. They really make the bike visible in traffic.
  • A heated seat would be nice. 
  • Perhaps handlebar risers and liners for the panniers and top box. 
  • A deep clean
Now time to go shopping